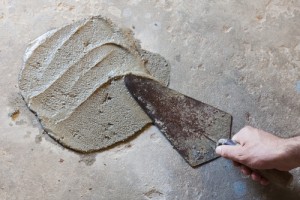
At your home, your business, or your client’s property, concrete surfaces are everywhere. Periodically, they crack, chip or break and need repair. Being able to effectively repair concrete saves you from having to invest in an entirely new slab. Typically, all you need is patching mortar, a liquid bonding agent, a flat and pointed trowel, and possibly a light sledgehammer. Here’s a look at the process needed for common small concrete repair jobs.
- Filling Cracks
There are two types of cracks that form in concrete. The first is a hairline crack with a diameter of less than one-eighth inch. Those can be repaired using polyurethane caulk. Clean out the crack with a wire brush, then use a caulking gun to apply the caulk and use a putty knife to smooth the surface. The second type of crack is wider and requires a different, slightly more complex repair process. You’ll actually need to make the crack larger to allow the patch to stay in place, so chisel the crack until it’s at least an inch deep and two inches wide. Use an undercutting technique, which makes the base of the crack wider than the surface to enable the patch to lock in place. You’ll then remove any loose sediment and clean the area before coating the damp crack with your bonding agent and then applying the mortar.
- Broken Corners
There’s a special technique used for repairing corners of concrete surfaces that have become chipped and broken. First, you’ll chip away the corner until you’re left with solid concrete. Brush away any debris left over and apply your bonding agent. You’ll then tape scrap lumber around the area to create a form, but be sure to coat the inside with motor oil to keep it from sticking to your surface. You’ll then use your pointed trowel to shape mortar into a new corner, then use a small board to compact the mortar and remove any air bubbles. You can also use this board to level the surface once you’ve filled your form to the top. After about 30-minutes, it should be set enough to remove the form.
- Mending Steps
Concrete steps often become chipped along their edges. Repairing your steps begins in the same way as other repairs, with chipping away loose concrete. You’ll want to create a V-shaped groove in the step, then clean the area. Place an oiled board that’s the same height as the step against the step held up by concrete blocks or other weights. Then you can coat the area with your bonding agent and begin applying the mortar with your pointed trowel. Be sure to press the surface of the patch with your trowel to remove air bubbles, then allow it to set for about an hour. After removing the board, you’ll likely need to touch up the area that was covered by the board with a flat trowel.
- Curing
Regardless of what type of concrete repairs you’re working on, curing the mortar patch properly requires some additional attention. Mortar must be kept wet so plan to mist with a garden hose at least three times each day for the first three days. Then, continue misting twice each day for the next week. It will take about a month to cure completely and it’s wise to keep traffic off the area for at least three weeks. Drying too quickly is also a problem that will prevent proper curing, so after misting your patch, cover it with a plastic trash bag, tarp, or wet burlap.
If you have a concrete project you’re working on, come see us at Maxwell Supply in Tulsa. We have all the supplies you need for patching and repairs, or to lay a brand new slab.
